Reminder: This functionality requires the Processor edition of ACH Universal.
One-time setup
Create a new account to work in.
You’ll want to create a new Account for Return files. From the main menu select File > New > Create an account - and then complete the wizard. Note: In this example, we named the account 'Returns'.
Default the account to create ACH Return files
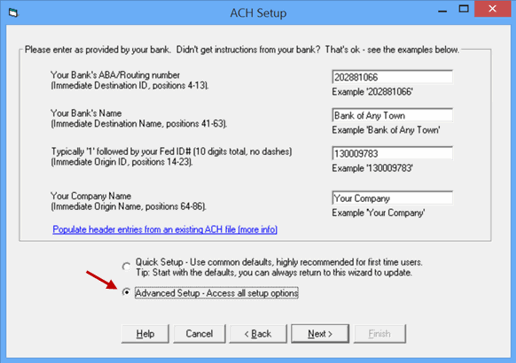
From the program Home Page, click ACH File Setup, then next.
Enter your header information here.
Note: If you don't have your header information, you can skip this and come back to complete it later, but it will be needed before sending the file to the bank.
When finished, select 'Advanced Setup - Access all setup options' to enable the 'Next' button to continue. Click Next.
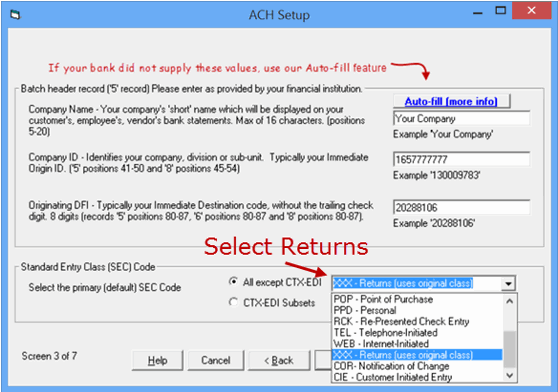
Select 'Returns (uses original class)'. Click Next, then Finish.
Prepare sample/test data
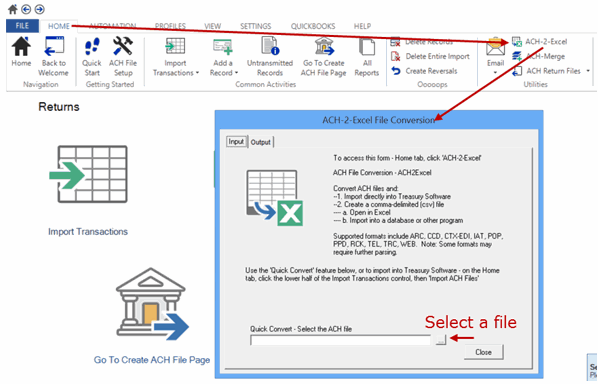
On the Home tab, click ACH-2-Excel.
On the form, select an ACH file to convert. Once selected, allow the conversion to continue.
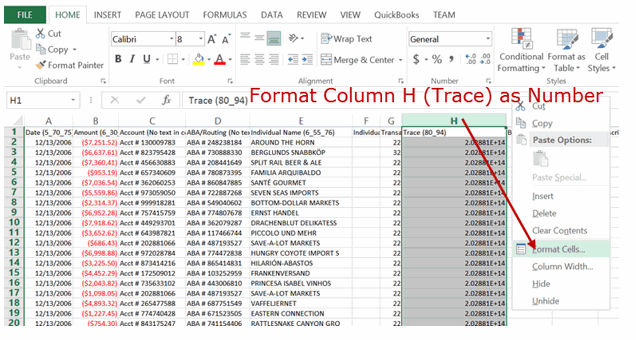
A spreadsheet will open with the converted data. Format column H (Trace number) as a number to avoid the values being displayed in Exponential Notation.
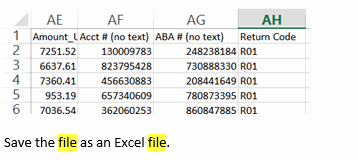
For this sample, add a column to the rightmost field - and enter Return Codes.
Note:Enter the 'R' plus a leading digit if applicable. For example, for Insufficient Funds, enter R01 as below.
Set your mappings.
Click on Import Transactions to start the wizard.
Select the Excel file you just saved in the previous step and click Next.
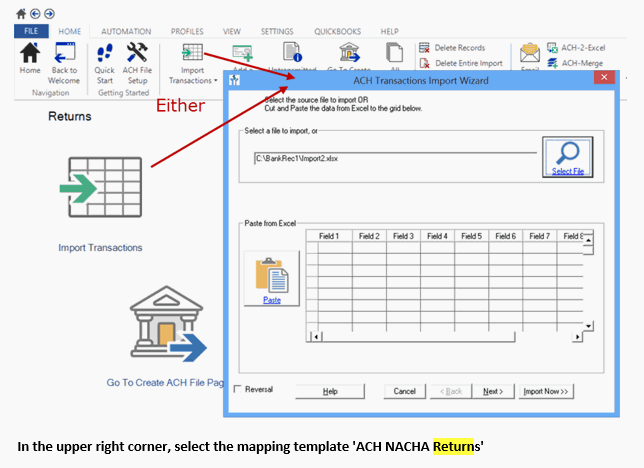
Warning: There is a similar named template called 'ACH Returns', depending on your version, you can use this as well.
Also check the 'Save as default'.
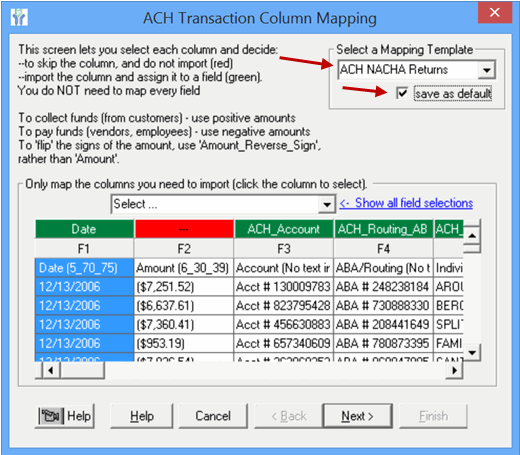
This mapping template is used for a variety of purposes, so we're going to modify it now for our use. We're going to unmap four fields.
To unmap a field, click on the field.
First click on fields F3 and F4 to unmap them. Your screen should now look like:
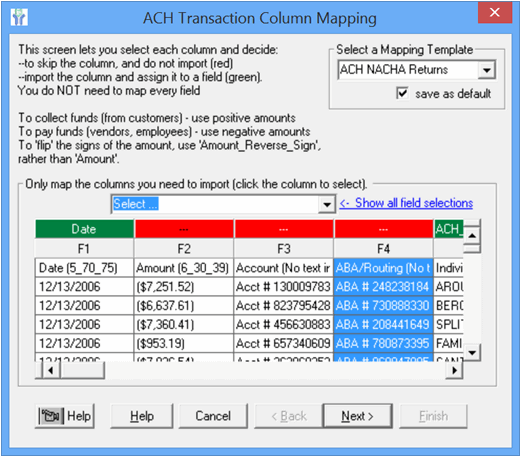
Field F5 should be mapped 'Name'. Map this if needed.
Scroll to fields F31 and F32 and unmap them.
Now, we're going to map three fields.
Select field F32 and from the drop down list select Bank_Account_Number.
Select field F33 and select ABA_Routing_Number.
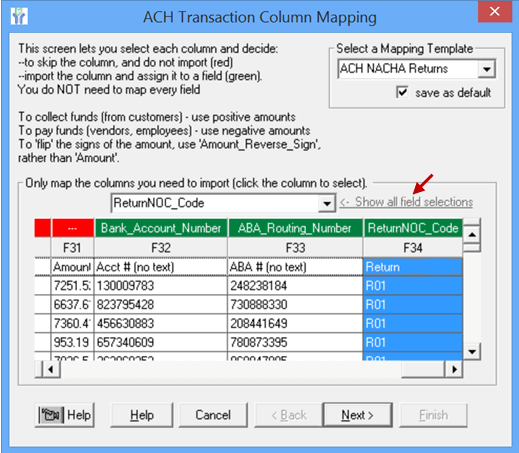
Click on the 'Show all field selections' (see red arrow below)
Select field F34 and select ReturnNOC_Code
Click Next, Next and Finish to import and most importantly - to save your mappings.
Common mapping question:
Q: Why didn't we map field 2 for amount?
A: This field is signed. We already had field 26 mapped which is unsigned, as the transaction code will supply the debit/credit information.
Note: There are multiple amount fields for different purposes.
Create a test ACH Return File
From the Home page - click on the Go To Create ACH File Page - and then click on Create (see below).