
Custom Code 369
Do not enter this code unless you have been contacted by Treasury Software support.
There may be additional procedures, update routines and archiving processes that run in the background which are not documented here.
Treasury Software cannot support the unauthorized use of custom codes for clients other than those for which this code is intended for.
Alternative QuickBooks email address
Before you begin:
A. Backup your QuickBooks data files.
B. Backup your Treasury Software account file (brd files). Please use either File > Backup or simply copy using WIndows Explorer to copy the folder C:\Users\Public\Treasury Software
Did you backup your data - we really mean it!
Next steps:
1. Download and install Treasury Software version 2016, build 606 or later from http://www.treasurysoftware.com/download/index.aspx
2. Start Treasury Software. From the main menu select 'File' > 'New Account' > 'Add an Existing Account' to your catalog and select the .BRD (account) file to add to your catalog. Allow the software to update the account(s) if prompted. Repeat this step for each .BRD (account) file. Enter your new license codes.
3. Enter into the account in Treasury Software you will be using.
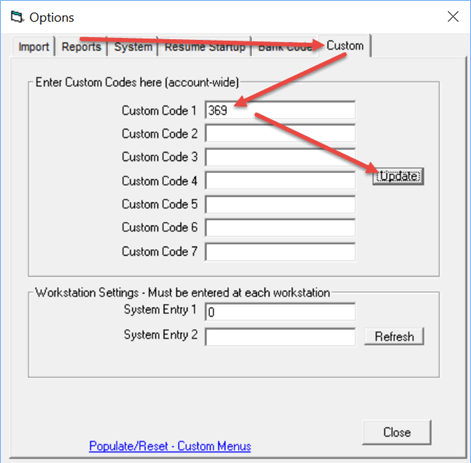
On the main ribbon bar, click Settings > 'Import, System' > then on the pop-up window - Custom tab (on the far right) > enter 369 in Custom Code 1 > Update. Close the window when complete.
In QuickBooks
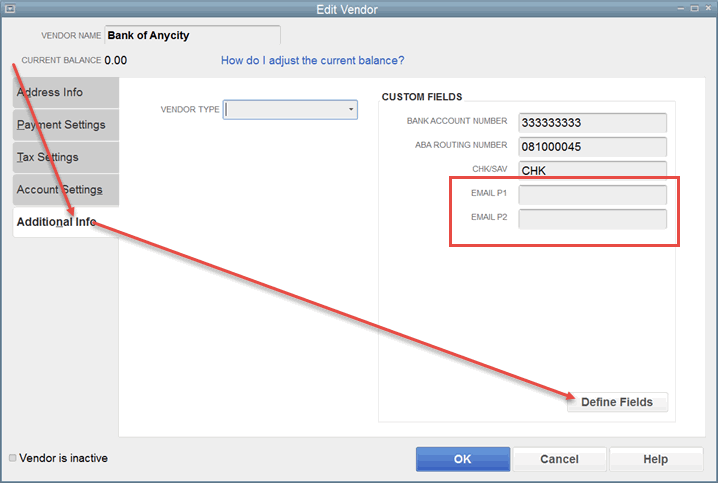
4. Enter into the account in QuickBooks you'll be using. Enter into the Vendor Center and select any vendor and edit that vendor. Select Additional Info tab > Define Fields. Create the two additional fields for vendors (and make sure that you check the box to display):
Email P1
Email P2
Save your work. When finished it should look like the image below.
Let's now move your email addresses from Alt Email 1 to the fields Email P1 (and Email P2 for overflow).
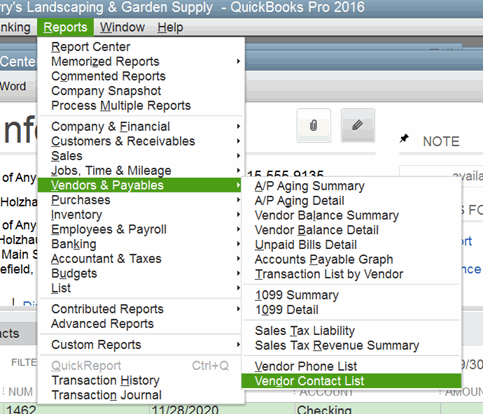
5. In QuickBooks, run a Vendor Contact list report by selecting Reports > Vendors & Payables > Vendor Contact List.
Add the Alt Email 1 field to the report by clicking on Customize Report > checking Alt. Email 1.

6. Save this report to Excel. Note that you will have a column header titled 'Vendor'.
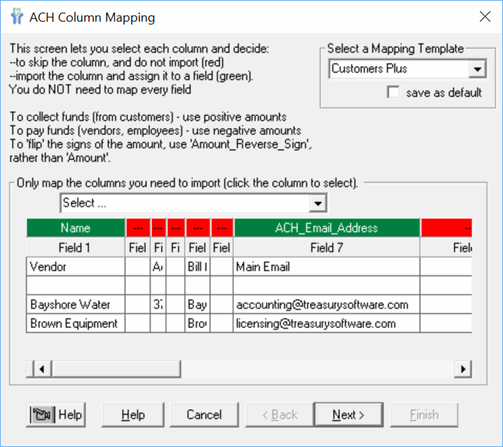
7. In Treasury Software, select QuickBooks > Update Vendors in QB > select the file and click Next.
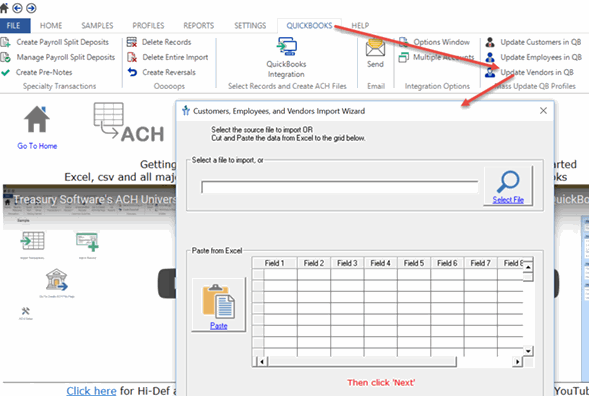
Map only two fields:
Name
ACH_Email_Address
and complete the wizard.
Note: Do NOT map any other fields.
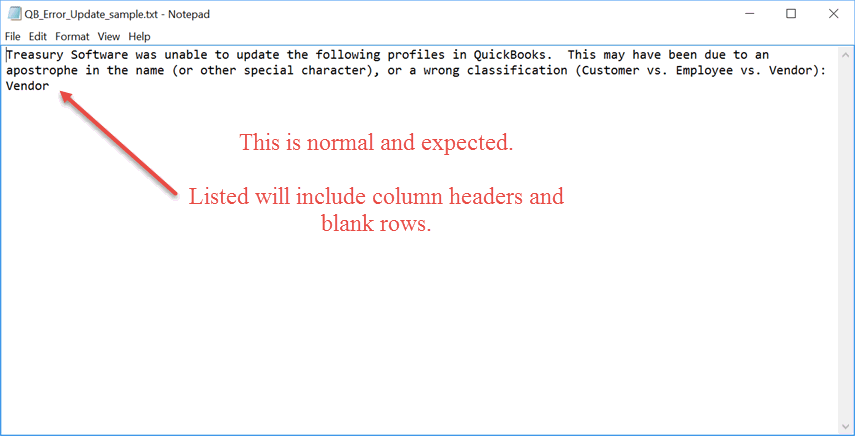
When finished, you'll get a 'Done' message and this report.
The header will be listed. Please review for any other vendors.
Congratulations!!
Setup is complete. Use the software as usual. When emailing ACH remittance emails, the system will use the address in Email P1 (and Email P2) as rollover.
FAQ's
Why are there two fields Email P1 and Email P2?
There are length limitations within QuickBooks, and any emails too long will roll to the next field.
How I enter new email addresses in?
If they're 21 characters or less, you can simply enter them into Email P1.
However, for simplicity (and having to avoid counting) - you can split them between both fields at any point.
For example:
Email P1 accounting@
Email P2 treasurysoftware.com
During the email process the system simply concatenates the two fields.
