
ACH Edit™
ACH Edit is a utility within ACH Universal Processor edition, which enables users to edit and then recreate ACH files. Transactions can be:
--added
--edited
--deleted
Getting Started (2 steps):
1. Create a new account within ACH Universal Processor edition.
Click File > New Account > Create - and complete the wizard.
2. Turn ACH Edit 'On'.
Click on Home > ACH File Setup > click to screen 6 of the wizard > check 'ACH Edit'. Complete the wizard to save.
Tip: On the screen 2 will be the default file and batch header settings. You can enter this now, or any time before transmitting to your bank.
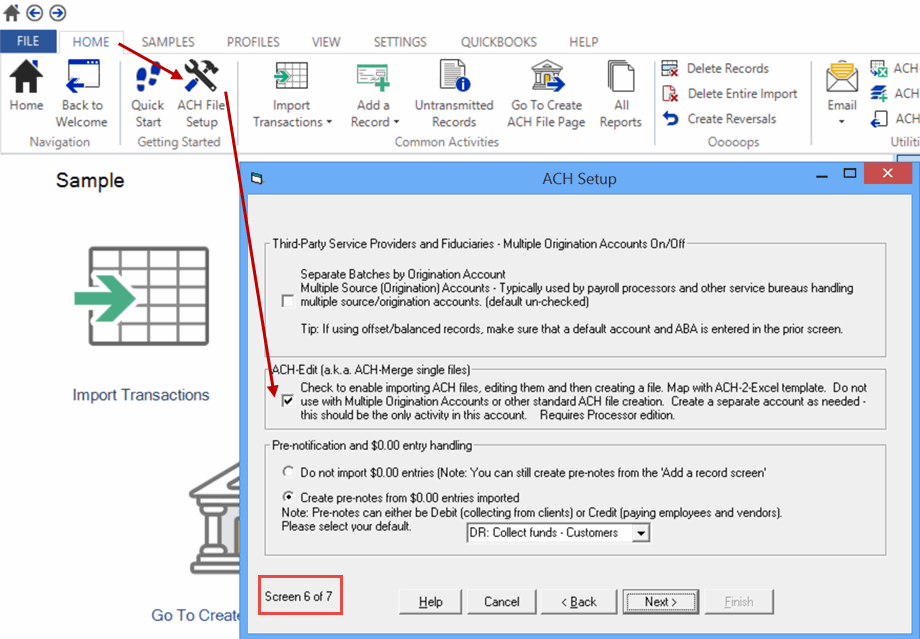
Congratulations, you're done with Setup.
Use
1. Import ACH files
Start the Import Wizard using the bottom half of the Import Transactions button and selecting Import ACH file.

The Wizard will walk you through several screens including the Mapping window. Do not change any of the mappings.
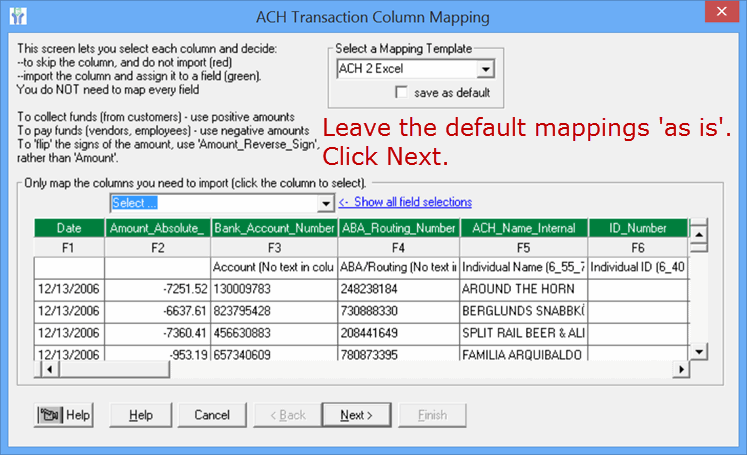
2. View all records - then Add/Edit/Delete records
Click Home > Untransmitted Records > to display all of the records
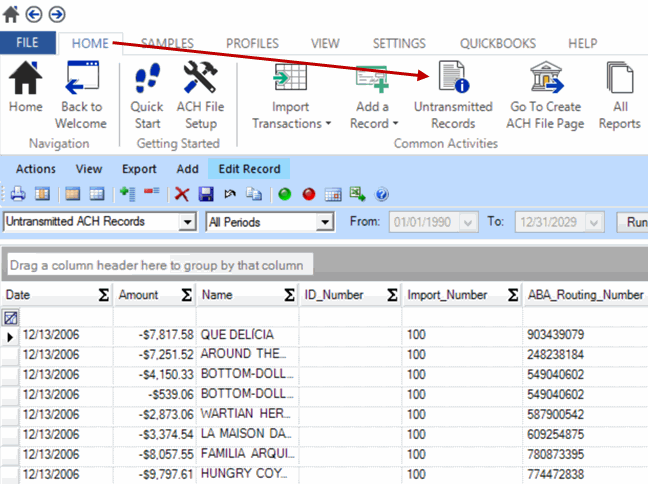
Once you've displayed the records, you can add, edit and delete.
Add
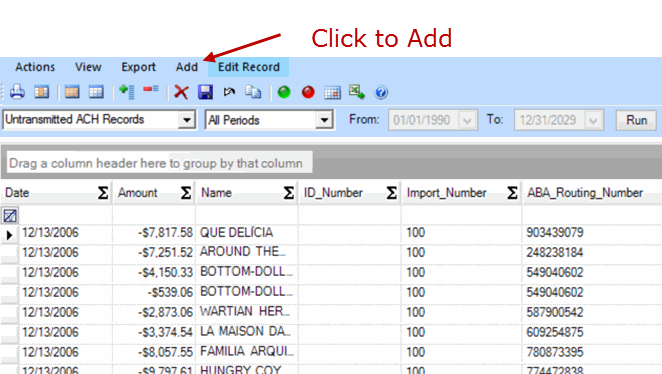
Edit
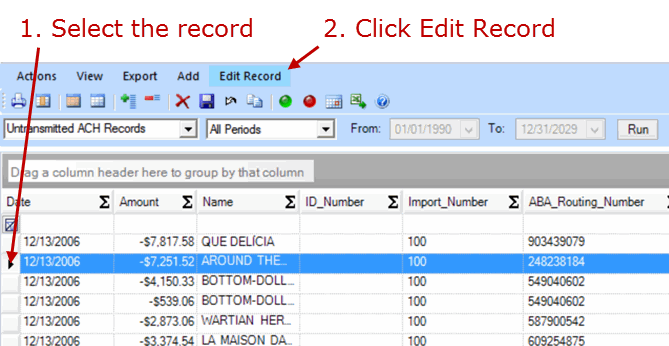
Select the record, then click 'Edit Record'
Delete

3. Create the ACH file
Select Home > Go to ACH File Create Page > Click on Create ACH File - you're all done!

Notes:
--This feature requires the Processor edition of ACH Universal.
--The import and file creation process can be automated with the included Software Integration Kit.
--Dates can be updated for multiple records using the 'Change Dates' icon on the Reports toolbar. To use the current default date, unmap the 'Date' field from Field 1 in the import wizard.
