Child Support ACH Addenda
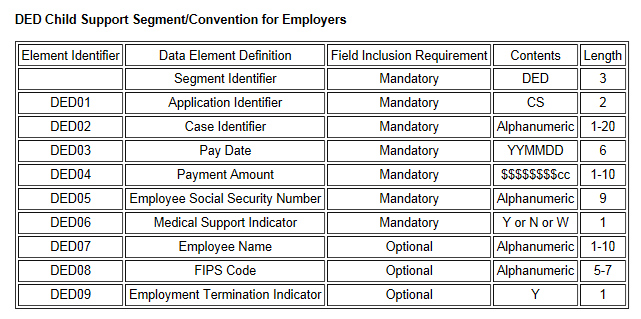
While there is no national standard format, many states use a format similar to the Commonwealth of Virginia, which is shown below:
The states require a CCD+, which is simply a CCD record with the + referring to the Addenda record.
1. Create a Tax Profile for the Governmental Agency
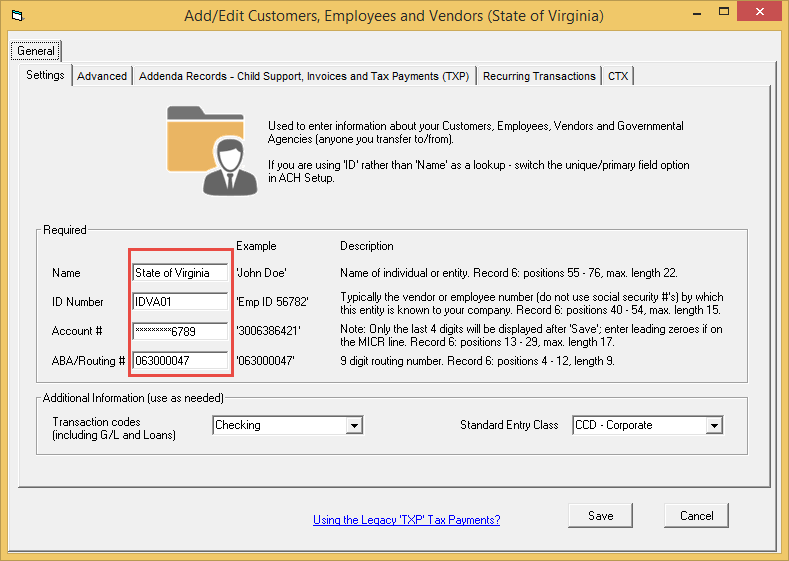
From the Profiles tab > select Add.

Enter the information for the agency as you normally would.
ACH Universal will auto-populate as CCD (CCD+ will be when the Addenda record is created).
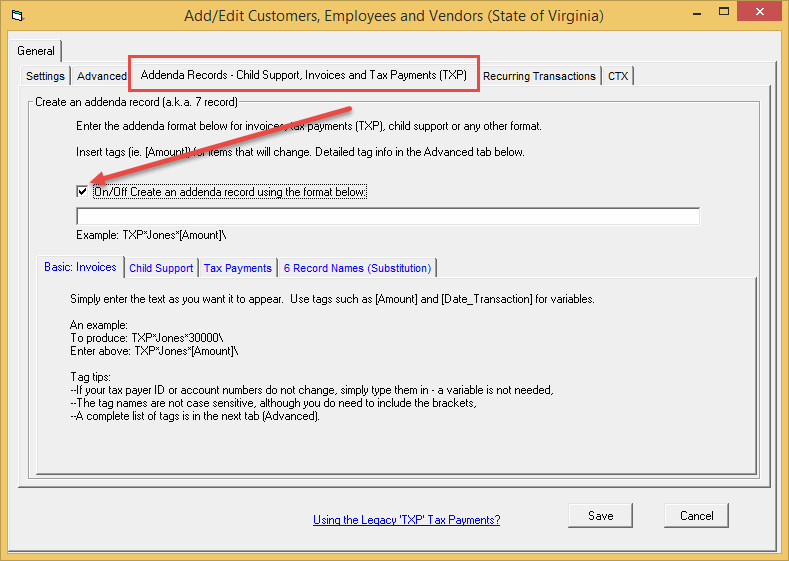
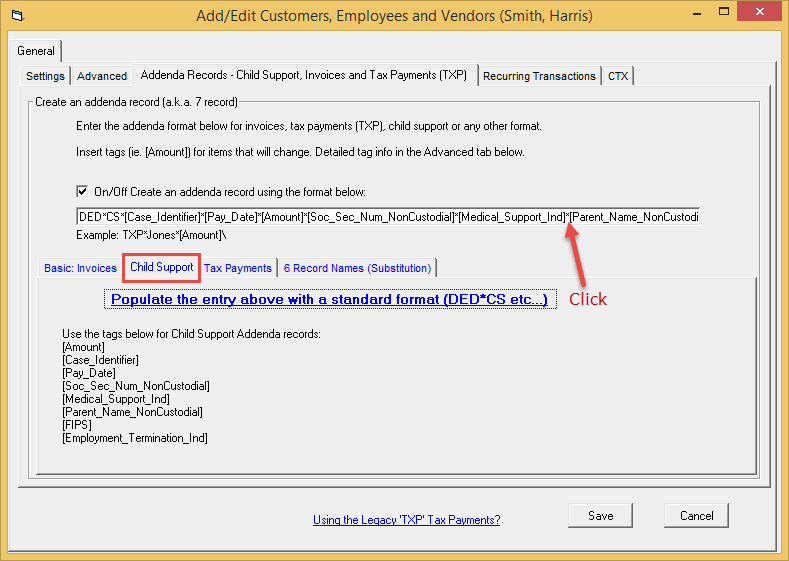
Click the addenda tab, and turn on (check) the 'Create an addenda record' option.
On the Child Support sub-tab, click the hyperlink 'Populate the entry above...'
For most users, this is all you need to do.
Note: If you will only be paying the state on behalf of one employee, you can overwrite any of the variables and hard-code the Addenda record.
For example, you can update the template to pay on behalf of John Jones, with a case identified of 12345678, and Social Security number of 333224444.
From (default template):
DED*CS*[Case_Identifier]*[Pay_Date]*[Amount]*[Soc_Sec_Num_NonCustodial]*[Medical_Support_Ind]*[Parent_Name_NonCustodial]*[FIPS]*[Employment_Termination_Ind]\
To:
DED*CS*12345678*[Pay_Date]*[Amount]*333224444]*[Medical_Support_Ind]*Jones,John*[FIPS]*[Employment_Termination_Ind]\
Of course, if you are paying on behalf of multiple employees, leave the default.
Click Save when done.
2. Creating transactions
Method I - Manually add a payment
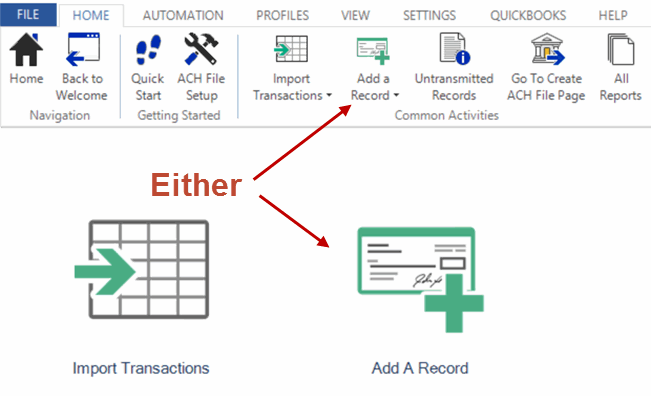
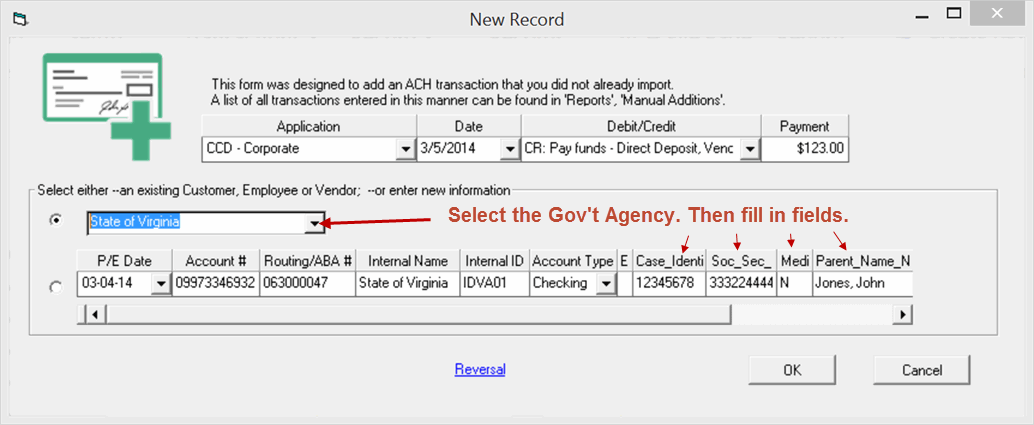
In the New Record screen, select the Government Agency and enter in the balance of the fields. Click OK when finished.
Method II - Importing transactions
a. Create a CSV or Excel file that looks similar to this:

b. Start the Import Transactions Wizard from the Home page and select the file that you created.
At the mapping screen, map the fields in a manner similar:

Complete the Import Wizard.
When finished with importing or adding records, create the ACH file as normal.
Your file will include the Addenda records (7 records) and should look similar to:

Advanced Options
Advanced Option features require the Processor edition of ACH Universal.
Want the funds to come out of different bank accounts?
Use the Multiple Origination Accounts feature.
Want different taxpayer name and ID's in the payment (6) record?
Turn on the 'Substitution' feature in the Government Agency's profile.
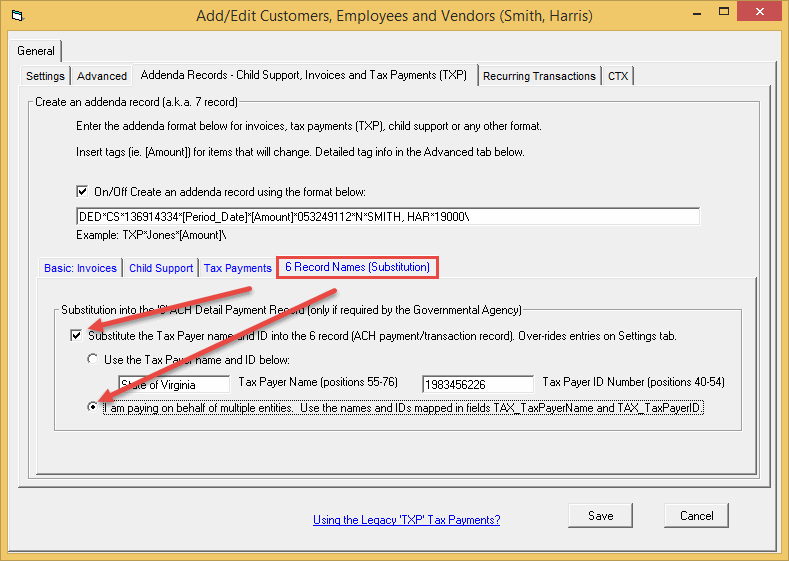
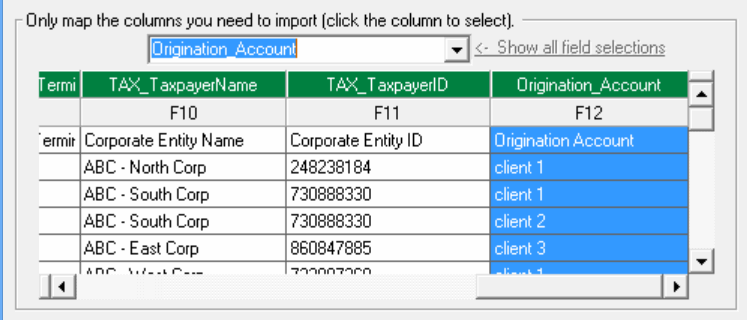
Then, during the import process, you can map the TAX_TaxpayerName, TAX_TaxpayerID fields (located in the Tax section of the dropdown mapping list) as well as the Origination_Account field as needed.
