
Want to take ACH Universal for a test run?
If so, this page is for you.
Steps:
1. If you haven't done so already, download the software from the link below and install on the same computer that QuickBooks is running on.
http://www.treasurysoftware.com/download/index.aspx
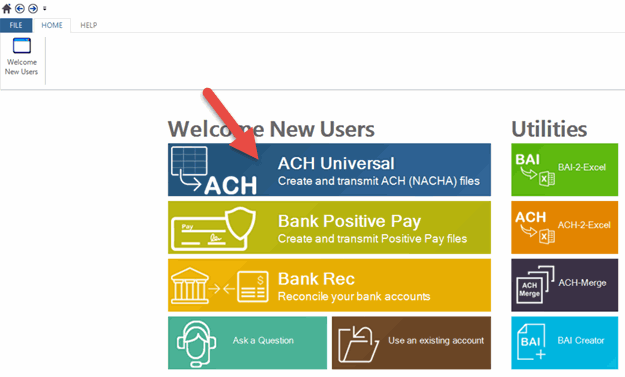
2. Start the software to arrive at the 'Welcome New Users' page and click on ACH Universal
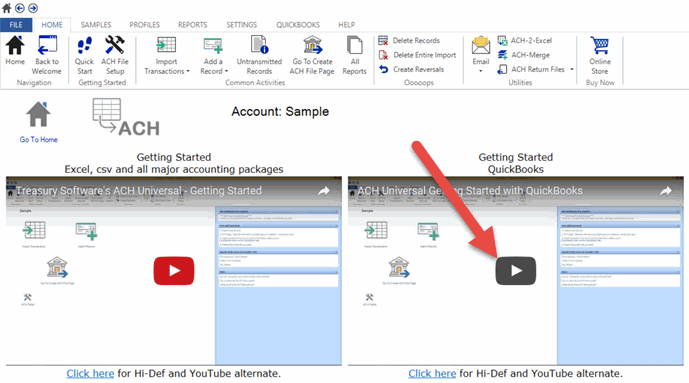
3. You will be brought to our Getting Started page.
We recommend viewing the 5-minute tutorial video on the right (Getting Started with QuickBooks).
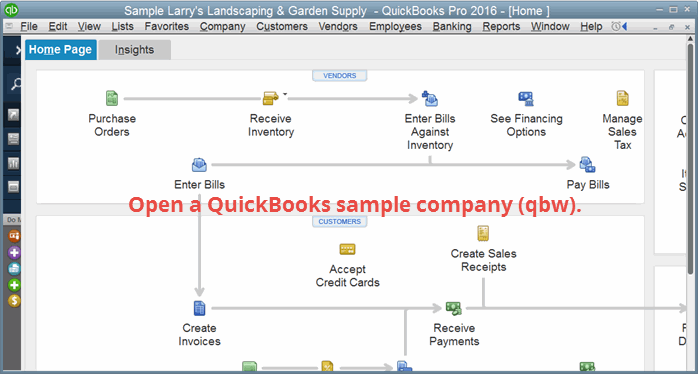
4. Start QuickBooks and enter into a company.
You can use either the service-based business or product-based business (QBW file) to follow along on this demo.
In the example below, we are using the sample company, Larry's Landscaping & Garden Supply (service-based business).
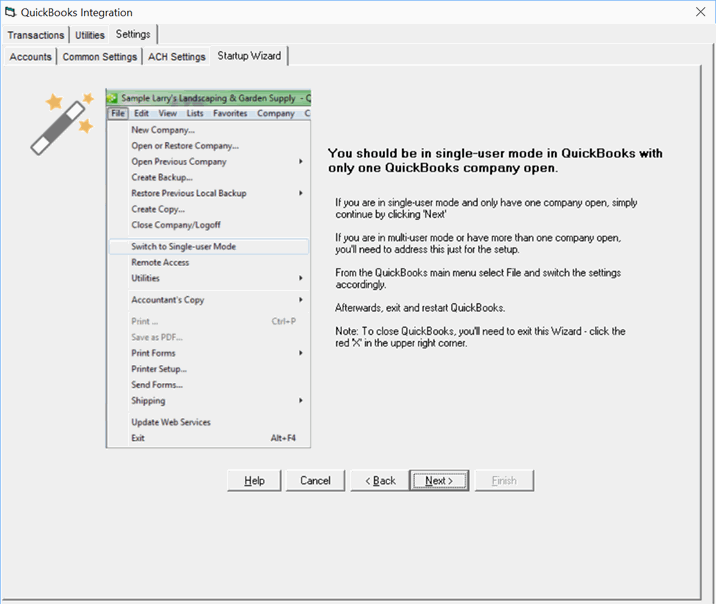
Note: For the initial setup, you must be in single-user mode with admin rights.
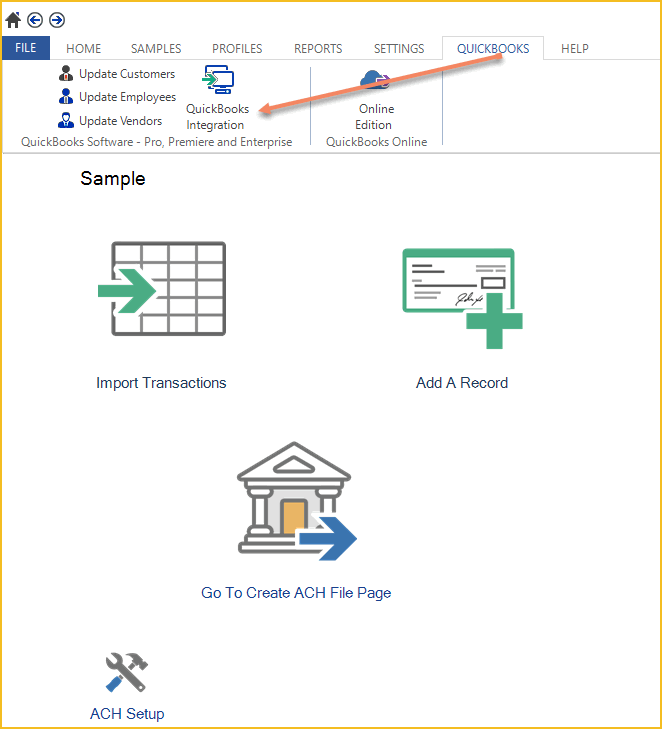
5. In ACH Universal, click the 'QuickBooks' tab on the main menu, then QuickBooks Integration.
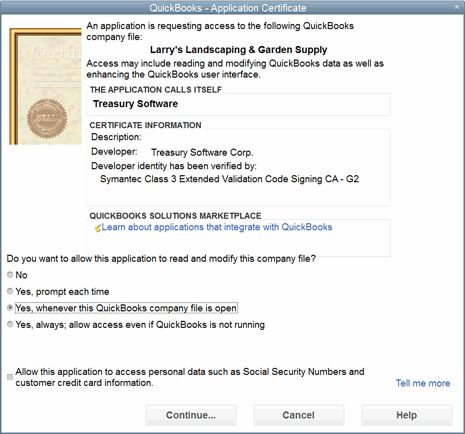
6. This will prompt QuickBooks to display a security authorization window--it will be flashing in your taskbar.
Click the icon in your taskbar to view the Application Certificate form below.
You can opt for either the 3rd option (typical), or the 4th option (advanced/rare, only if you will be running our software when QuickBooks is not running).
Make your selection and complete the Wizard.
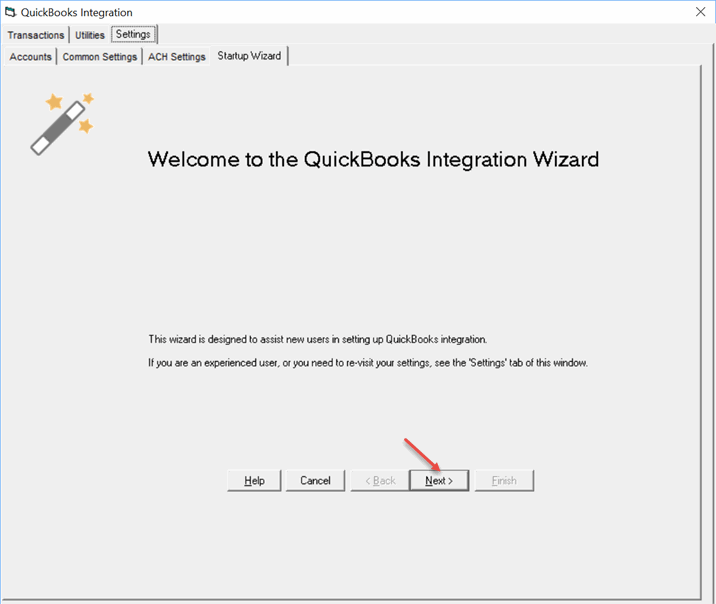
7. The QuickBooks Integration Wizard will now be displayed.
Click Next.
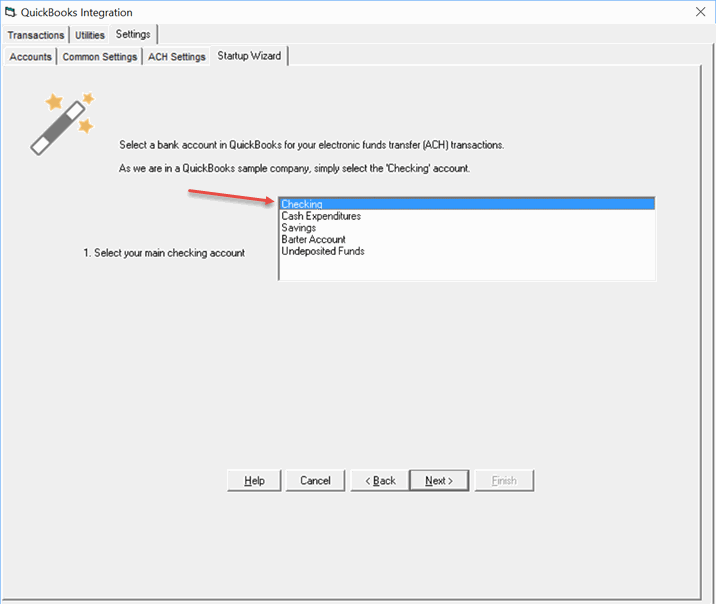
Your bank accounts and Undeposited Funds account for the open QuickBooks company will be displayed.
For the demo, we are selecting Checking as it contains the most transactions.
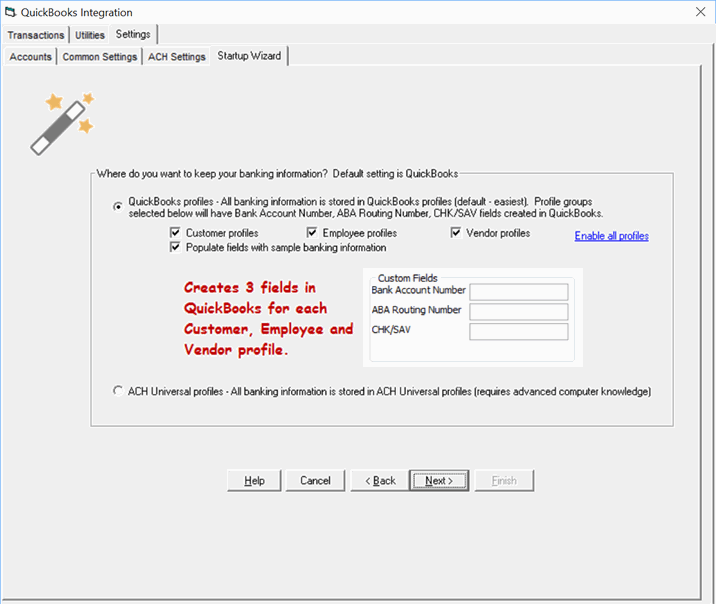
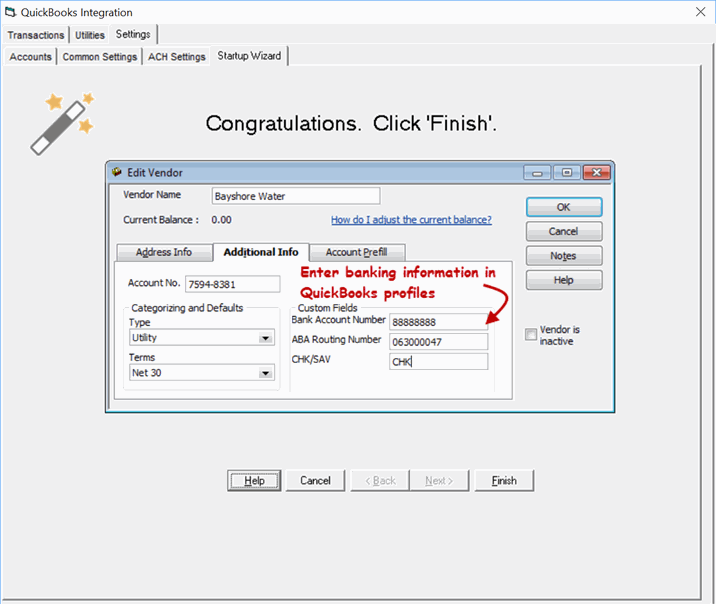
ACH Universal creates three custom fields within each Customer, Employee and Vendor profile in the QuickBooks company.
As we are in a sample QuickBooks company, the option to populate these fields with sample data is checked.
For this demo, leave the default settings as is and click next.
A reminder that--just for the initial setup--you should be in single-user mode with admin permissions.
Note: While creating the fields is fairly quick, populating the sample account with data can take a few minutes.
Click Finish to complete the wizard.
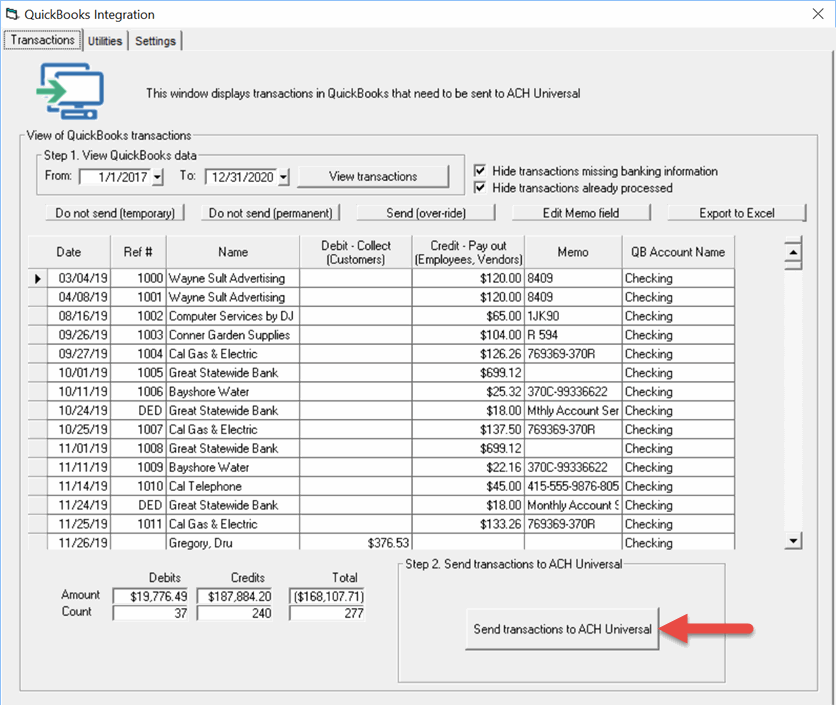
8. Creating an ACH file
The software will now display the transactions available for transmission from within the QuickBooks bank account that was selected in the Wizard. Click 'Send Transactions to ACH Universal' to create an ACH file.
Click Yes when prompted to view the file.
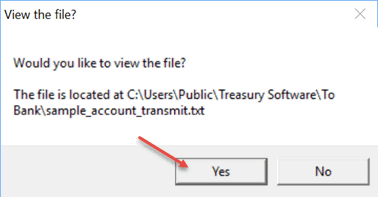
Your file will look similar to the screen shot below.
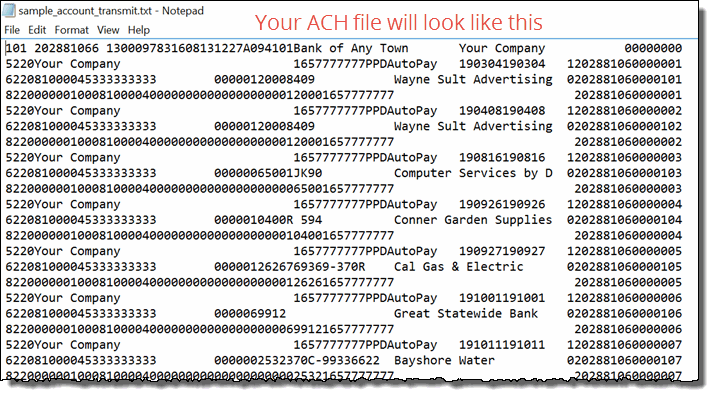
Congratulations. You've successfully created an ACH file from your QuickBooks data.
If this were a 'live' production run, you would then upload this file to your bank.
Where is the data stored?
In QuickBooks:
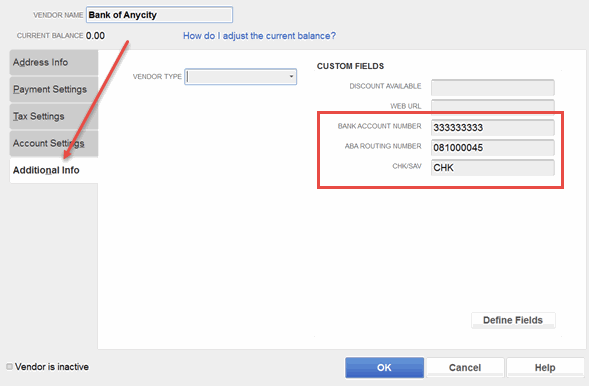
ACH Universal created three custom fields in QuickBooks when you ran the Integration Wizard. Typically one would enter the banking data here, although in this demo ACH Universal populated sample banking data for you.
To see an example in QuickBooks, go to the Vendor Center, click to edit a vendor, and click on the Additional Info tab.
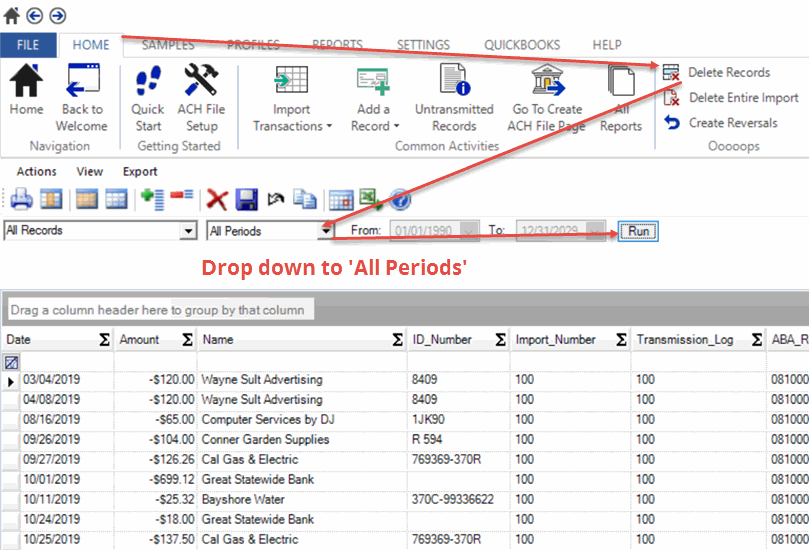
To see data stored in ACH Universal:
From the Home tab > click Delete Records > then from the 2nd drop down select 'All Periods'. Click Run.
Reminder: Select 'All Periods' from the drop down as QuickBooks' sample accounts are future dated.
Want more information, or would you like to schedule a live demo with Treasury Software Support?
Please contact us at 866 226-5732 or online.
