
QuickBooks Troubleshooting - Setup
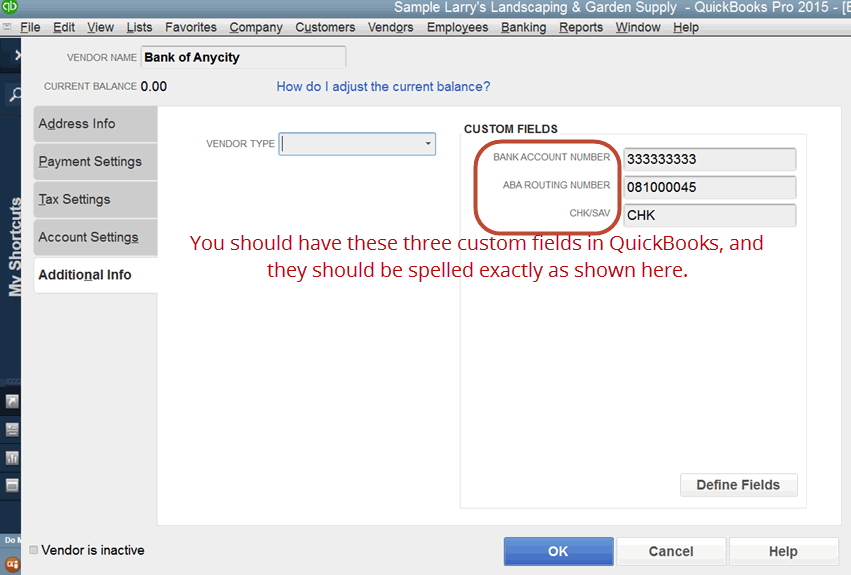
When setup is successfully completed, three custom fields should have been created within QuickBooks (see below).
However, if the software brought you to this page, the setup didn't create the three fields needed.
To fix/check this, we need to go to QuickBooks
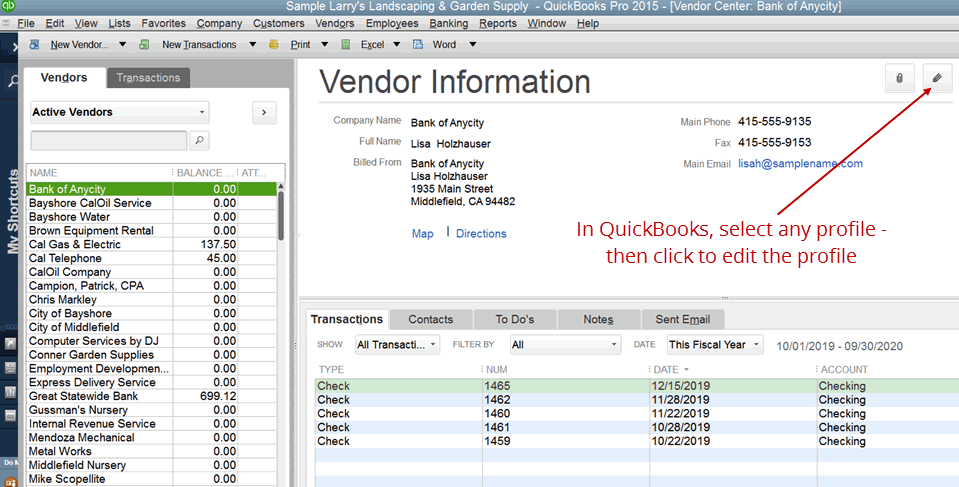
In QuickBooks, navigate to either the Customer, Employee or Vendor Center.
In this example, we'll navigate to the Vendor Center.
The first profile (vendor) will be displayed by default. Simply click on the edit button on the upper right.
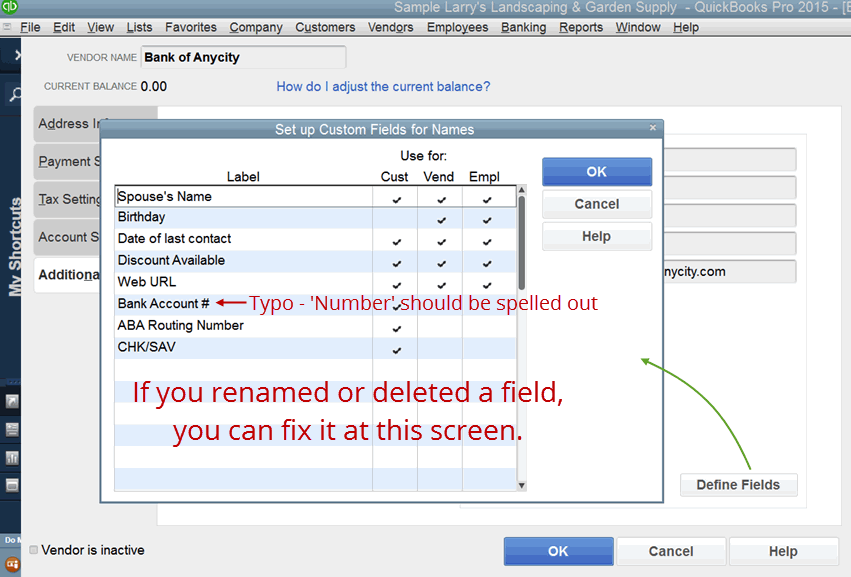
On the profile window, click on the Additional Info tab, then 'Define Fields'

The three field names that should appear exactly as shown are:
- Bank Account Number
- ABA Routing Number
- CHK/SAV
If you had a typo or had to re-enter a field, you can stop here, close the edit window and try the Integration Wizard again.
Tip: Don't forget to check the boxes for the profiles you want to display (Customers, Employees, Vendors).
I don't have any of ACH Universal's fields.
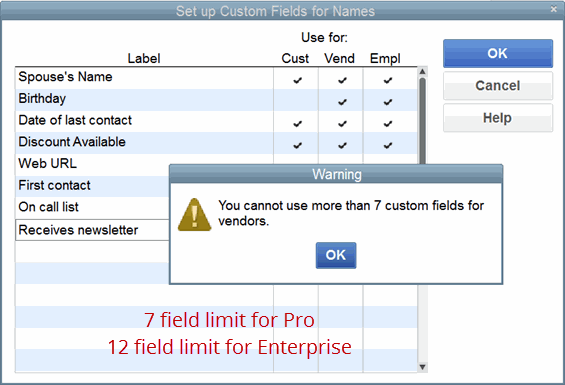
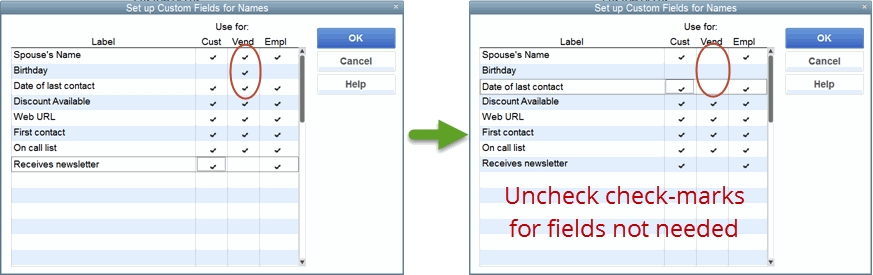
You may not have enough available custom fields.
The maximum number of custom fields in use (checked boxes) for each profile type (Customers, Employees, Vendors) is 7 for Pro and 12 for Enterprise.
To fix: Uncheck fields that you do not need.
Pro and Premiere users:
As there is a 7 field limit, the most check-marks that you can have in a column is 4 (as ACH Universal will need to create 3 in each profile).
Enterprise users:
As there is a 12 field limit, the most check-marks that you can have in a column is 9 (as ACH Universal will need to create 3 in each profile).
Tip: You only need to unmark check-boxes for the profile types (Customers, Employees, Vendors) that you will be using with ACH Universal.
Once you have updated the fields, click OK and close the profile edit window.
In ACH Universal, you can reselect the QuickBooks Integration Window and click 'View Transactions'. You will get the same message as before, but on the following screen you can opt to re-run the Wizard (please do so to complete).
Note:
If you have upgraded, and did not have a CHK/SAV field, you can over-ride this verification:
Select the Settings tab > click 'Import, System' > 'Import' tab > QuickBooks suppress field warning > select 'suppress'.
