Importing your check file
Import Check File Data
Using the Check Register Import Wizard: follow this process to import check issuance transaction data to create a check issue file for upload
to the bank.
Importing from QuickBooks™? See our QuickBooks Integration Wizard.
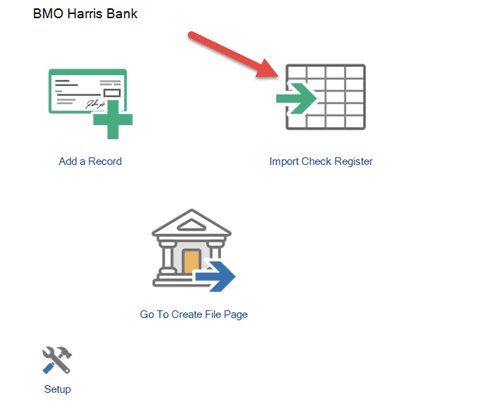
1. Start the Check Register Import Wizard by clicking the Import Check Register icon in the center of the homepage or by selecting
Import Transactions off the top menu.
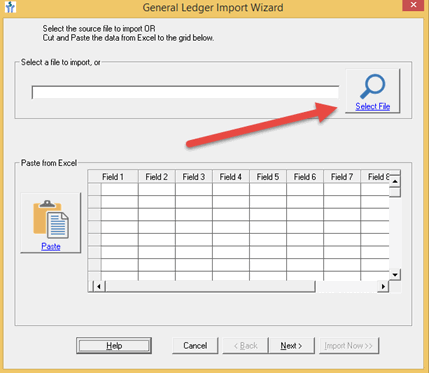
2. To import check data, you can browse and click “Select File” under the Folder icon.
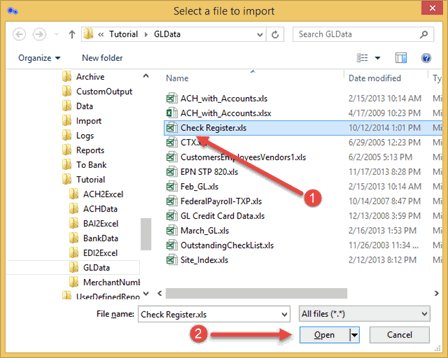
To select a file to import, select your file and click Open. Common file software types are Excel® (.xls), Access®
(.mdb) , Comma Delimited (.csv or .txt), tab delimited (.txt) and text (.txt).
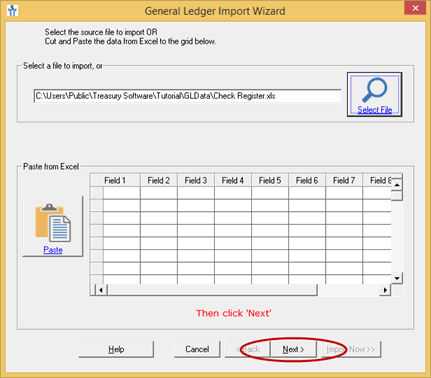
Notice the path and file name have now been populated in the General Ledger Import Wizard window. Click Next to continue.
The “Select a worksheet or range” screen is designed to allow the user to select the appropriate worksheet from an Excel® file
that contains the data to be imported. If you can see your data from the Excel® file in the grid, simply click the Next button.
If prompted to select a worksheet then please do so.
If you choose source data from a Microsoft® Excel® file, data can be copied directly from the Excel® spreadsheet and pasted directly
to the software by selecting the Paste button.

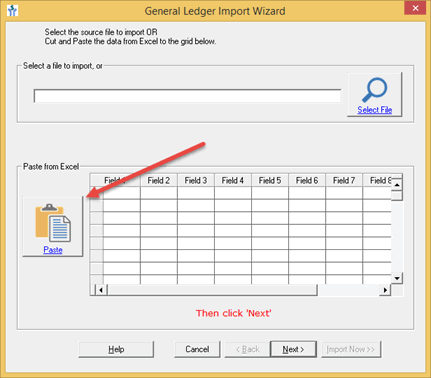
The screen below shows the check issue data pasted from an Excel® Spreadsheet.
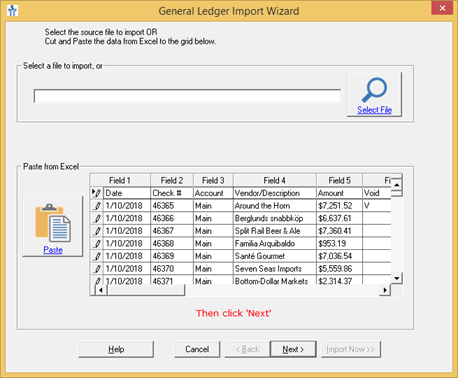
Click the Next button.
3. The General Ledger Column Mapping screen (below) enables the user to identify what information is contained in each column on the import file.
Simply highlight a column, and then select the appropriate column mapping from the drop down for the data.
Be sure to map the required columns:
--Date
--Check Number
--Amount/Amount Reverse Sign,
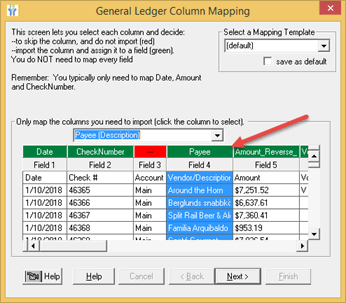
In addition, if you are enrolled in Payee Positive Pay, map:
Payee (Description)
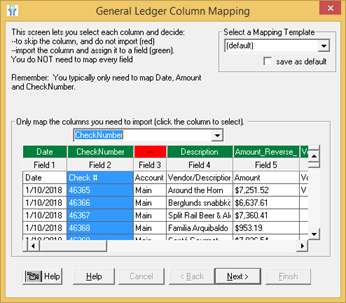
Amount notes: The system expects issued (cut/printed) checks to be negative and voided checks to be positive.
If your issued / cut checks are displayed as 'negative', simply map them as 'Amount'
However, if your issued / cut checks are shown as a positive amount - map the field as 'Amount Reverse Sign'.
Example, in the screen below - the checks are displayed as 'positive, therefore we mapped the column as 'Amount Reverse Sign'.
Reminder: Payee names should be mapped as Payee (Description) for those who are creating check issue files with payee name
data.
4. Mapping notes:
• Debits: when importing debits as positive transactions, map the column for the amounts as Amount_Reverse_Sign. This ensures
that the debits will be viewed as balance decreasing transactions.
•Account numbers are not required in the input data, and do not need to be mapped.
•Optional (the system automatically defaults the correct RA and VA) - Action indicator: Identify void or deleted items. The action indicator should be included in the source data that is loaded to the File Formatter software within a separate column:
- Register Adds: Default, no action necessary.
- Register Deletes: Action indicator of “D”.
- Void Adds: Opposite +/- of default items.
- Void Deletes: Opposite +/- of default items and action indicator of “D”.
•You need to map the columns only one time (or whenever you change the format of the input data).
•The section above the column field numbers (Field 1, Field 2, Field 3, etc.) switches from red to green ( as shown in the screen below) and lists the selected mapping. Repeat for all required columns.
IMPORTABLE RECORDS
1. The “Review records” screen displays a list of the importable rows and invalid rows. To review the list of Importable records, click on the + (plus sign). The records listing will expand and display a list of importable checks, and the basic check information.
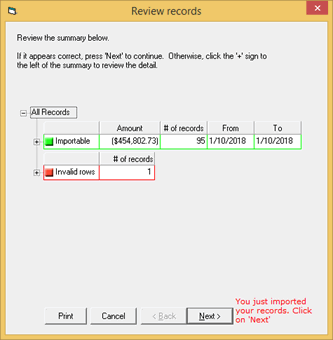
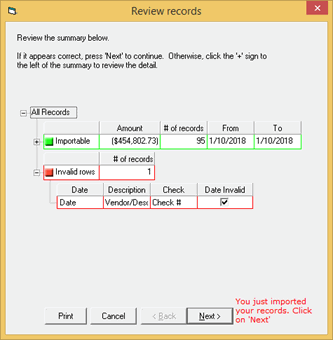
The invalid row is the row of column headings. The File Formatter automatically marks header rows, footer rows, summation lines, and blank lines as invalid. For each row that is invalid, a check mark will be placed in the appropriate column indicating why the row was invalid. In the screen shot below, the invalid row was the column header - and therefore didn't contain valid transactional data.
2. Once you have verified the importable information is accurate, click the Next button. If you wish to cancel
the import process and try again, simply click the Cancel button.
3. Click Finish to complete the General Ledger Import Wizard.
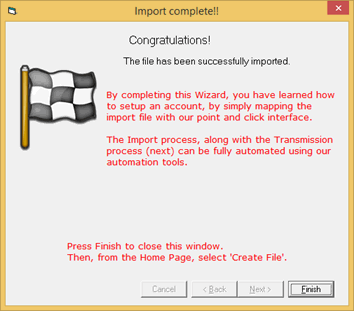
Please proceed to the next section "Create and Transmit the File".
