
Integration Wizard
Once you have connected to your QuickBooks company, you can complete the Integration Wizard.
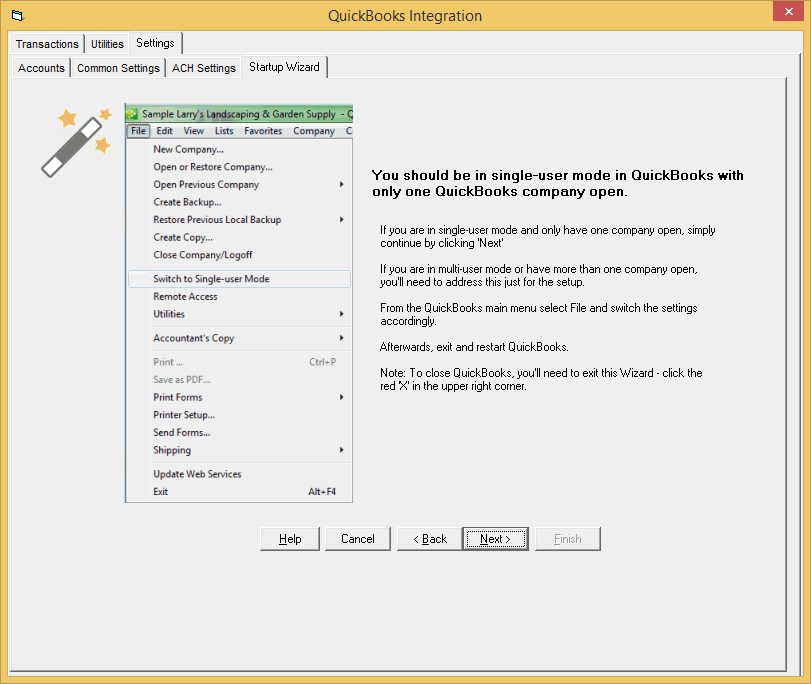
Reminder: You should be in single-user mode in QuickBooks with only one QuickBooks company open for the initial setup.
Enter into your account and select the QuickBooks tab > QuickBooks Integration.

Note: This is the same menu choice you selected earlier to establish a connection. Once a connection has been made, the settings are automatically saved--it is a one-time setup.
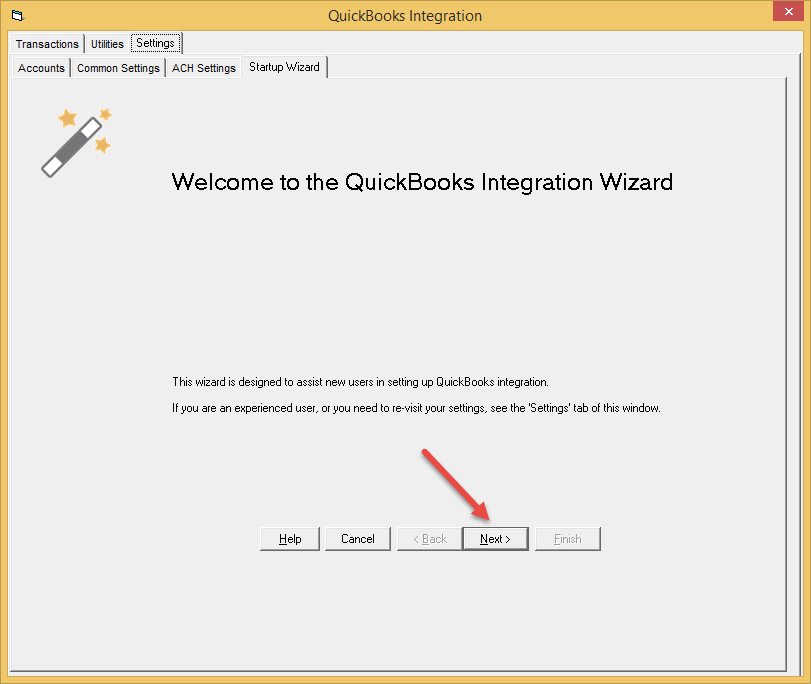
Welcome to the QuickBooks Integration Wizard
Click 'Next'.
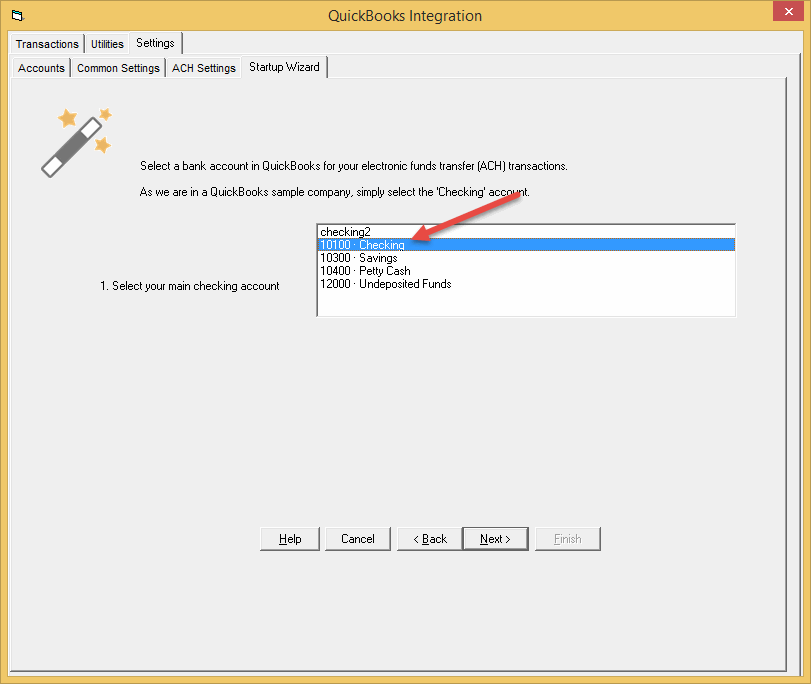
View the list of your QuickBooks accounts - select your bank account
Have more than one origination account? We'll cover this in settings.
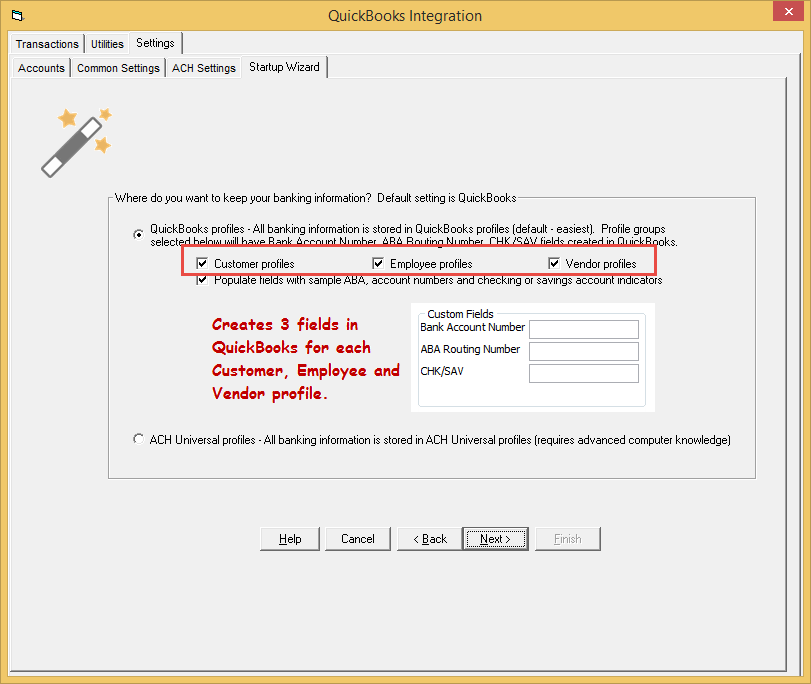
Confirm that 'QuickBooks profiles' is selected, and that the profiles you want to work with are checked.
This step will create three Custom Fields in your profiles.
QuickBooks Pro, Premiere and Enterprise should leave the default top option selected. (See below)
If a profile group is unchecked, and it is one you need, stop here and close the Wizard. You may need to remove some existing custom fields for that profile group.
[Note: If you are using QuickBooks Online, select ACH Universal profiles.]
You must be in single-user mode and logged in as an Admin. If you need to, make the changes in QuickBooks, then close QuickBooks and re-enter.
Click 'Finish' to save your settings
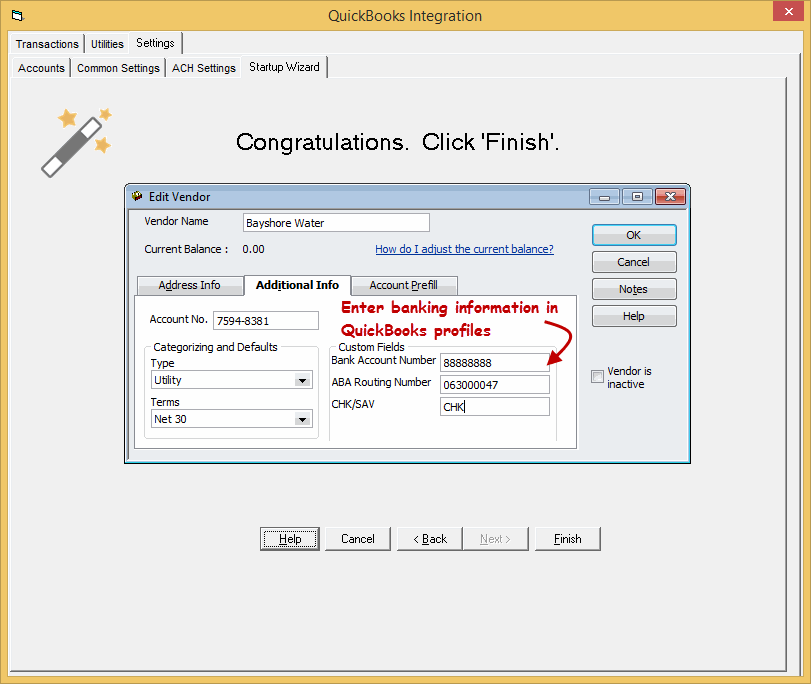
In QuickBooks - enter banking information
Now working in QuickBooks, enter in the banking information as shown above for the customers, employees and vendors that you want to collect from or pay electronically.
To enter banking information for:
Customers - From the QuickBooks main menu select Customers > Customer Center.
Double click on the customer, and then select the 'Additional Info' tab. Enter their banking info, then click 'Save'.
Employees - From the QuickBooks main menu select Employees > Employee Center.
Double click on the employee, and then select the 'Additional Info' tab. Enter their banking info, then click 'Save'.
Vendors - From the QuickBooks main menu select Vendors > Vendor Center.
Double click on the vendor, and then select the 'Additional Info' tab. Enter their banking info, then click 'Save'.
Next step - ACH Setup - Entering your company's info
